
As I've said, something new comes up everyday. This afternoon, I tried my hand at scribing panel lines on my current work-in-progress, the MG Strike Rouge. I only have the faintest idea on how to go about the process. All I know is one needs a line scriber (which I don't have), thick adhesive tapes as guides (which I don't have), and some patience (oooh, I have lotsa those!) May the Gunpla gods have mercy on me on my first try.
I've got in my hand my first can of beer. San Miguel Beer Pale Pilsen to be exact.
I want my MG Strike Rouge to be a bit different from the other Strike Rouges that have been built. If you've been following my previous posts for some time, you would know by now why that is the case... and I would never tire of saying it -- Cagalli's MS is my favorite.
I am quite a brave chap... or probably a stupid one at that. I didn't practice scribing on trees/sprues/runners or spare parts... I'd have none of that. Instead, I went ahead and did it on my Rouge. If something goes wrong, there's always Tamiya putty. ^_^
On to the task at hand. First of all, I needed a plastic line scriber (which I don't have) for scribing the part -- a piece of armour on the Rouge's forearm. I used my X-acto knife for this purpose. I replaced the #11 blade with a spanking new one. My lack of a line scriber and the use of my X-acto knife makes it official -- this post should be a part of my "Poor man's Gunpla" collection.
Now I needed a thick adhesive tape. You know, those Dymo self-adhesive labeling tapes? The ones where you can emboss your name onto? Yes, the thick ones... and yes, I don't have 'em too... I just used Tamiya masking tapes today... although I will get those Dymo tapes soon.
I didn't have a hard time imagining the design of the extra panel lines. I looked into the perfect grade version of the Strike/Strike Rouge for inspiration. I've always adored the design of the PG Strikes, so that's where I started.
Step 1: Nothing special on the following image, I just used a pencil to outline the panel line I am going to scribe.
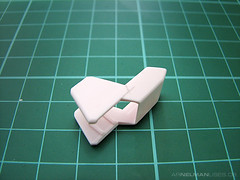
Step 2: I used Tamiya's masking tape as guides for the blades of my X-acto knife. Gingerly scribe lines on to the part using the back of the knife. There's no need to rush things now. It is better to run the blade tens of times over that part rather than use brute force. You're not trying gut the part you know. Think of yourself as a graceful, well, grave digger. ^_^ You need not remove 6 feet of earth all in one digging, right?

After scribing the guide lines, you can remove the tapes and proceed to deepen the panel lines. The tapes would just be a hindrance once you are in the stage of deepening the lines. If you find yourself making wayward lines, don't worry, we'll take care of that later.
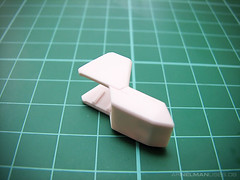
Step 3: After digging the grave, err, scribing the line. Use a grit-800 sandpaper to clean up the new panel line and to remove the wayward strokes of your knife. In my case, I used 3M's Ultrafine sanding sponge for the job. Here's how it looked like after the clean-up. Not bad eh?
I'm now on my third can of beer... damn, I'm too slow tonight!
For a little comparison, the scribed part is on the left while the unscribed one is on the right.
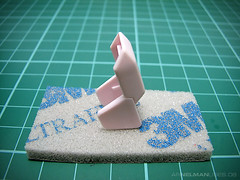
For good measure and an attempt to be faithful to the Evolve design (even though in panel lines only), I added more panel lines to the armour.

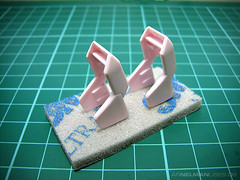
That's it! I survived my first try at scribing panel lines! Now you know why I'm drinking! ^_^
The only downside to this is that it takes up sooooo much time! I think it took me a couple of hours (pardon the newbie, please) to scribe that piece of armour.
I'm now on my fourth beer and it's time to wrap up this thing.
It's gonna be a long road ahead for me and my Rouge... and we'll be there at the end.
2 comments:
wow, this tutorial/guide is really useful..:D
Please tell me it worked right? I dont want to sumit it again if i do not have to! Either the blog glitced out or i am an idiot. the second option doesnt surprise me lol. thanks for a great blog!
Post a Comment