Remember my
Neb kit hose hack post last year (August, 2008), which was part of my Poor Man's Modeling series?
I didn't quite finish it, did I?
Anyway, resting after a sumptuous dinner-date with my fiancee last night wasn't really an option. Too much calories were taken in, and I had to burn some of them. Besides, co-members from a local GunPla forum got a bit interested in my pseudo-compressor of a nebulizer.
Let's get things underway, shall we?
First off, the materials. You need the following lest you decide to make the entire system out of paper mache:
A. A nebulizer kit hose (two of them, actually... I'll explain why you need two in the latter part.) These come relatively cheap from your neighborhood drugstores. You can buy the ones for adults, or the ones for infants. It really doesn't matter. On second thought, get the one for adults. You can use the mask as an alternative when you are doing the dirty deed -- airbrushing... what were you thinking? Anyway, each costs around Php100.00 a pop. If possible, get the hose without inner ridges.
B.
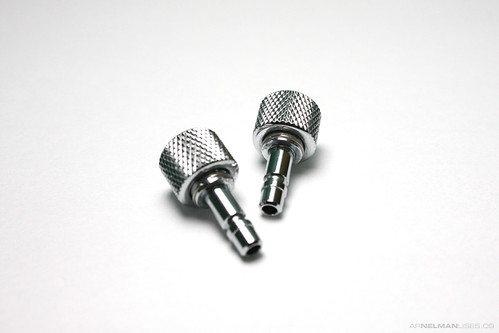
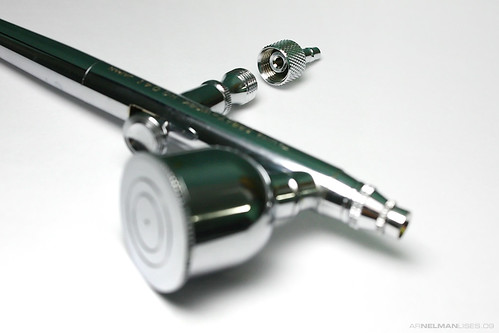
GSI Creos' One-Touch Plug for Mr. One-Touch Hose 1/8 S. These plugs aren't really necessary, but if you want your hoses to fit on your airbrush without them popping off from time to time, you might want to consider 'em. By the way, I'm using a Tamiya Spray Work HG airbrush and these plugs are the ones that work with it. If you've got a different AB, go to your favorite hobby store and get the plugs that work with YOUR airbrush. Don't come running back to me, crying, and saying that the plugs won't work. They come in two pieces per pack... I don't know why, but they just do. If you don't need the extra plug, sell it to a geeky friend. Say that it came from the Apollo rocket, or something important. Oh yeah, I got mine for around Php650.00 from STC in V-Mall, Greenhills.
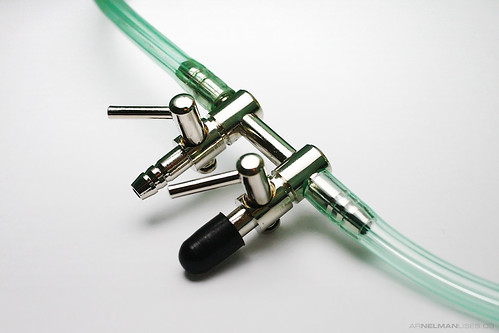
C. Bleeder valves. They are the ones used for aquariums to redirect/lessen the air going into your fishes' domain. You can make the bleeder valves work by turning the small levers. These valves can range from Php50.00 to Php120.00 each. Some has got two bleeder valves, while others can have three or four. They are not really required, but it's nice to have one around just in case you want to decrease the air volume going into your airbrush for detailing work. I don't use them. Really. I just bought one because I thought I needed it. I might someday. I was a boy scout. 'Nuff said.
D. A pair of scissors, or cutters... or blades. Any cutting tool will do. If two slabs of granite can cut cleanly through your neb kit hose, then fine.
E. Silicone or epoxy... some type of sealant. I used silicone for my hose.
Okay, now that we've put the requirements out of the way, it's time to hack that hose.
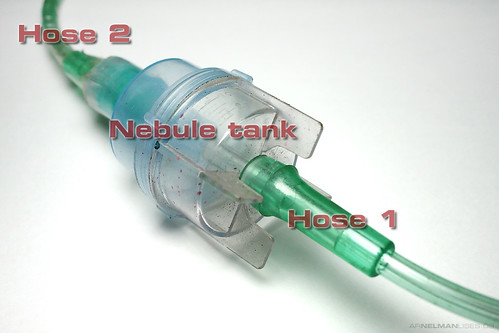
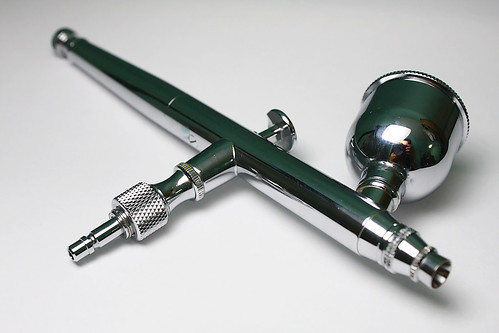
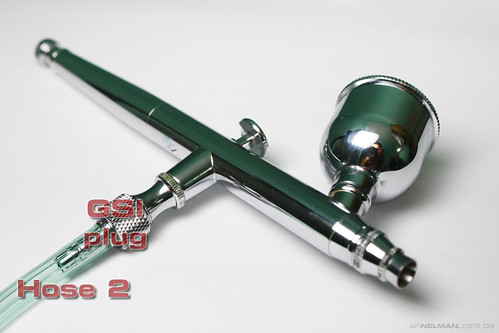
1. This is basically the nebulizer kit hose with the attachment for holding the nebule -- the nebule tank. Hose 1 is attached normally, while Hose 2 is attached to the part where the face mask is supposed to go. Fix Hose 2 in place by using the silicone... lots of it. In short, be generous with the application of the sealant. Let the sealant dry to bind the the pieces.
Notice the splatters of paint on the tank? ^_^
2. If you do not have the
GSI Creos' One-Touch Plug for Mr. One-Touch Hose 1/8 S, this will be the penultimate step for you. Otherwise, proceed to Step 4.
Attach the other end of Hose 1 to the nebulizer. You might need... I guess the proper phrase would be -- you WILL need to force the end of the hose to your airbrush. It may take a bit of elbow grease, but it will fit. Now, this isn't exactly what you may call a snug one, but it's the only thing you can do without the GSI plugs. I encountered a few times wherein the hose kept on popping out with this setup, so the plugs are a welcome addition.
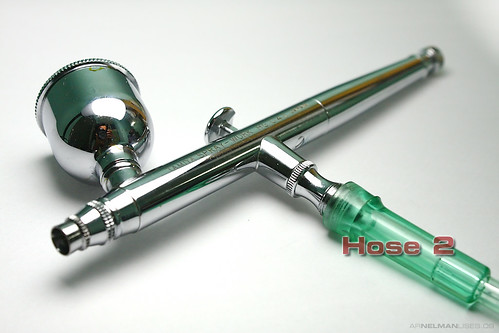
3. Attach the other end of Hose 2 to your airbrush. Proceed to Step 8.
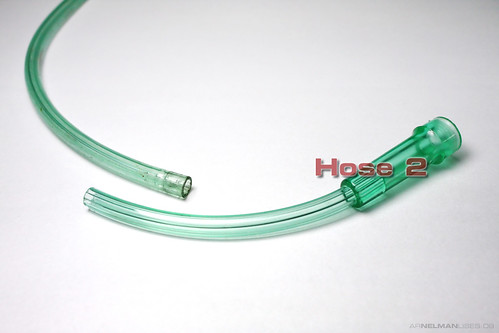
4. You should have reached this step if you've got the GSI plugs. If not, go back to Step 2. Cut the other end of Hose 2 (the one you didn't seal to the nebule holder) with your granite slabs, er, scissors.
5. Get one of the GSI plugs.
6. Attach it to your airbrush.
The Tamiya Spray Work HG airbrush and a GSI plug
The GSI plug attached to the Tamiya Spray Work HG airbrush
7. Attach the end of Hose 2 (which should now be cut) to the GSI plug. If the inner walls of your hose has got ridges, the air coming out of the nebulizer will leak. You can remedy this by tying Twist Ties to clamp the hose tightly to the plug.
8. You're done! But wait... in the case that too much air volume is rushing out of the nebulizer, you can do this final step to bleed some air out. This is one part in the Poor-man's-GunPla series, remember? We do not have enough moolah for air regulators. Cut anywhere along Hose 2. I would suggest to cut near the nebule holder so the length of the hose wouldn't be compromised in case you want to chicken out and not use the bleeder valves anymore. Insert the bleeder valve between the 2 pieces of Hose 2.
The bleeder valve installed
NOW you're done! Happy airbrushing!
Notes of further confusion:
1. You really need only one piece of hose to make this work. However, you will notice that as you go about airbrushing kit pieces of your precious PG Strike a bit longer, condensation will appear inside your hose. That's where the nebule holder comes in very handy. It acts as some sort of water trap. It is best if you put a piece (or two) of cotton balls in it (nebule holder) to be sure that water (condensation) will not ride up to your airbrush.
2. The transparent hoses make it easier to see if some sort of condensation (again, water) appears inside your hose.
3. This hack would work with either single-action or double-action airbrushes. However, as you may very well know, the dual-action functionality of, well, dual-action airbrushes, are useless without them being connected to air tanks
Click here to see the rest of the Poor Man's GunPla/Modeling series.Addition:
If someone else is using the nebulizer (most likely for health treatments like asthma) it would be best if you cover the neb unit when you are airbrushing. This is needed so that stray paint wouldn't stick to the unit and make it look like a graffiti wall.